Use AWS CodeBuild & CodePipeline to Automate Deployment to Elastic Beanstalk
AWS has its own build and deployment offerings, called CodeBuild and CodePipeline respectively, and naturally, they are integrated with the other AWS services. CodePipeline connects your GitHub repository with CodeBuild and Elastic Beanstalk so that any update to your repository is built and deployed automatically to Elastic Beanstalk.
In this post we will go through the process of integrating AWS CodeBuild and CodePipeline with our Elastic Beanstalk app.

Setting up CodeBuild
Most projects will have some sort of a build step before they are ready to be deployed to production, and it usually involves writing the output files that will be executed in the production environment. CodeBuild takes care of that part of the continuous deployment process.
The commands to execute in CodeBuild are described in a special file, called
buildspec.yml that should be at the root of your codebase. I’ll go through this file shortly, but let’s first create the build project in the CodeBuild console.
Click on the “Create project” button, and you will be pointed to this page:
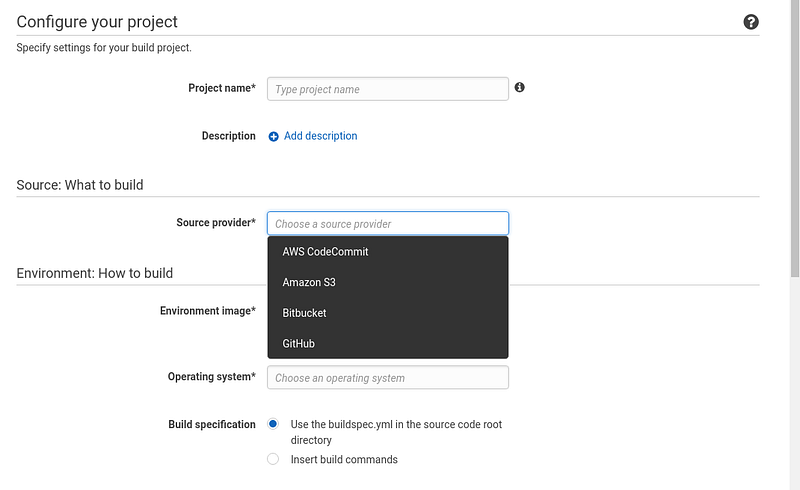
Pick a name of your choosing for the build project, and optionally a description. In the “Source provider” field, choose GitHub to link your GitHub repository. If the repository is private, you can authorize CodeBuild to access it on your behalf.
For the environment section, choose Ubuntu as the operating system, and Docker for the runtime. Please note that this is the runtime of the build environment, not your server’s runtime. The build environment depends on what tools and commands you are using to build your app. You can even choose a “Base” runtime and install the dependencies yourself. For Hollowverse, we use a custom Docker image to provide the build tools we need. I’ve covered this image in some detail in a previous post (See “Building the environment image”).
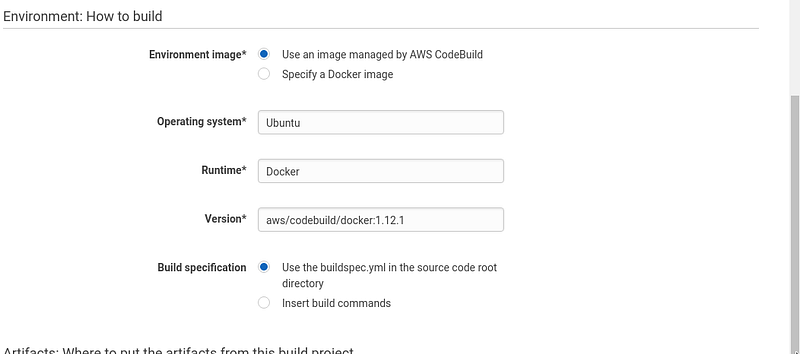
For the build specification, we are going to write a custom
buildspec.yml file.
CodeBuild will collect your output files and store them in S3, Amazon’s file storage service. The “Artifacts” section allows you to configure in which bucket the files will be stored and what name to use for the folder or ZIP file. The artifacts should be specified in
buildspec.yml.
To perform the build and upload the files to your S3 bucket, CodeBuild will need to have some permissions. While you can create a service role and give it the required permissions yourself, it’s just easier to let CodeBuild handle that for you.

Click “Continue” to finish the process.
Now let’s write our
buildspec.yml file! Remember, this should be at your project’s root directory.
Every
buildspec.yml should at least specify a version and a build command. If the project has artifacts, it should also specify an artifacts section:
at similar to the configuration files of CI services like Travis and CirceCI. There are multiple “stages” or “phases” that the build goes through: things to install, tests to run… etc. and finally the
build commands.
Note that even if we define the environment variables in the
env section of the file, we have to pass these variables explicitly to the Docker container. The commands specified in build: commands are just regular shell commands, and Docker containers cannot access the environment variables defined outside the container, unless they are passed explicitly.
We are done setting up CodeBuild. However, the only concern of CodeBuild is executing the build and storing the build artifacts. It does not watch your repository or deploy the build to Elastic Beanstalk. We still have to set up CodePipeline to connect all the pieces.
Setting up CodePipeline
In the CodePipeline console, click on “Create pipeline”.
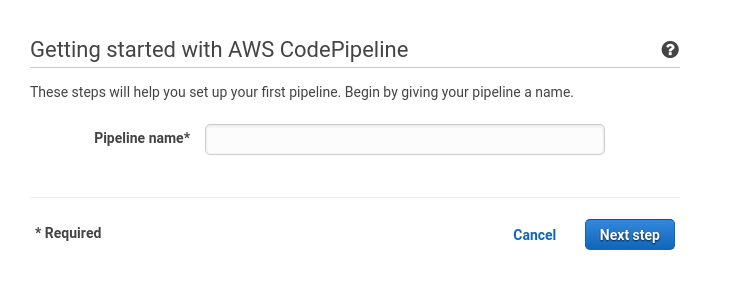
Choose a name for pipeline, and proceed to choosing the source, which in our case is GitHub:

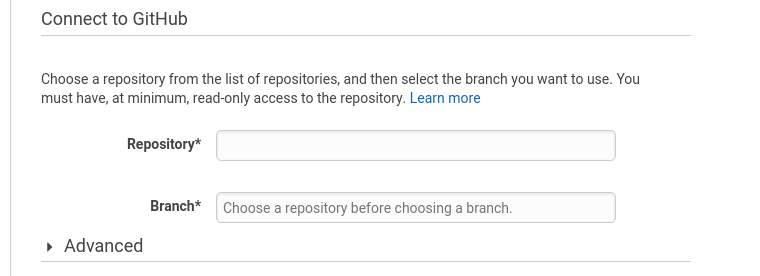
Connect with GitHub to fetch your repositories, and choose the repository you want to build. You will also need to specify which branch should be used for this pipeline. A pipeline can only monitor one branch.
For the build step, choose “AWS CodeBuild” as the build provider, and select the project you’ve just created in CodeBuild.
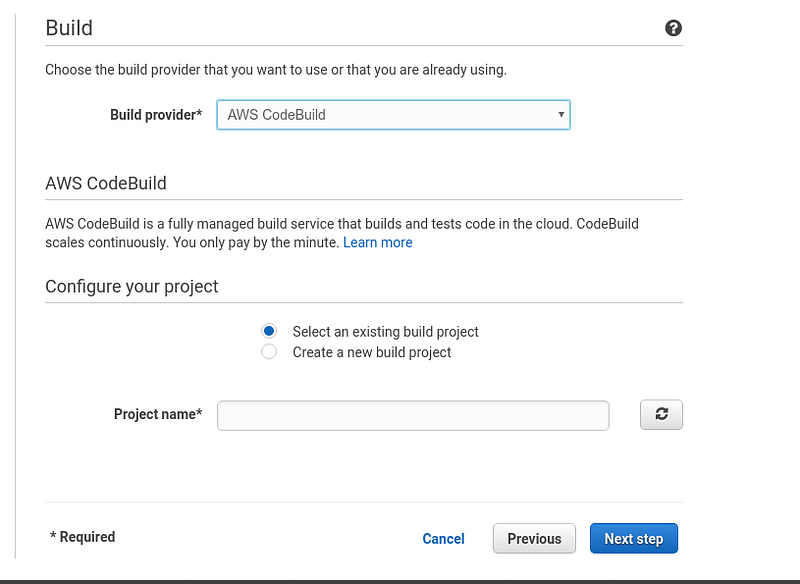
In the “Deploy” step, choose “AWS Elastic Beanstalk” and fill in the application and environment name you want to deploy to.

For the service role step, click on “Create role” and continue with the wizard to give CodePipeline the required permissions to build and deploy your project.

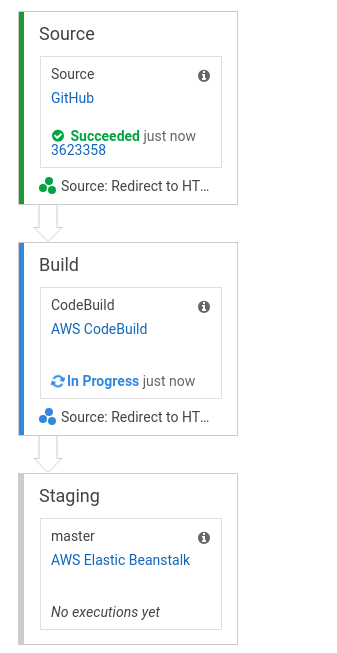
Review the settings and click on “Create pipeline” to finish the setup. You will be redirected to the pipeline’s page where you can visualize and modify the steps. CodePipeline will fetch the code from your GitHub repo and start building your project’s in a few seconds. Once that is finished, the build artifacts will be pushed to S3 and deployed as a new version on your Elastic Beanstalk app.
Congratulations! You’ve set a CI/CD pipeline for your AWS Elastic Beanstalk. Now you only need to worry about your codebase and let CodePipeline handle the deployment for you!
Comments
Post a Comment